Developer guide
CircleCI build pipeline#
We use CircleCI to build and test the operator code on each commit.
CircleCI config validation hook#
To discover errors in the CircleCI earlier, we can uses the CircleCI cli to validate the config file on pre-commit git hook.
Fisrt you must install the cli, then to install the hook, runs:<
The Pipeline uses some envirenment variables that you need to set-up if you want your fork to build
- DOCKER_REPO_BASE -- name of your docker base reposirory (ex: orangeopensource)
- DOCKERHUB_PASSWORD
- DOCKERHUB_USER- SONAR_PROJECT
- SONAR_TOKEN
If not set in CircleCI environment, according steps will be ignored.
CircleCI on PR#
When you submit a Pull Request, then CircleCI will trigger build pipeline. Since this is pushed from a fork, for security reason the pipeline won't have access to the environment secrets, and not all steps could be executed.
Operator SDK#
Prerequisites#
Casskop has been validated with :
- dep version v0.5.1+.
- go version v1.13+.
- docker version 18.09+.
- kubectl version v1.13.3+.
- Helm version v.3.
- Fork from Operator sdk version v0.18.0 : Operator sdk - forked
Install the Operator SDK CLI#
First, checkout and install the operator-sdk CLI:
Note : Use fork from operator-sdk, waiting for PR #317 to be merged.
Initial setup#
Checkout the project.
Local kubernetes setup#
We use kind in order to run a local kubernetes cluster with the version we chose. We think it deserves some words as it's pretty useful and simple to use to test one version or another
Install#
The following requires kubens to be present. On MacOs it can be installed using brew :
The installation of kind is then done with (outside of the cassandra operator folder if you want it to run fast) :
Setup#
The following actions should be run only to create a new kubernetes cluster.
or if you want to enable network policies
It creates namespace cassandra-e2e by default. If a different namespace is needed it can be specified on the setup-requirements call
To interact with the cluster you then need to use the generated kubeconfig file :
Before using that newly created cluster, it's better to wait for all pods to be running by continously checking their status :
Pause/Unpause the cluster#
In order to kinda freeze the cluster because you need to do something else on your laptop, you can use those two aliases. Just put them in your ~/.bashrc or ~/.zshrc :
Delete cluster#
The simple command kind delete cluster takes care of it.
Build CassKop#
Using your local environment#
If you prefer working directly with your local go environment you can simply uses :
You can check on the Gitlab Pipeline to see how the Project is build and test for each push
Or Using the provided cross platform build environment#
Build the docker image which will be used to build CassKop docker image
If you want to change the operator-sdk version change the OPERATOR_SDK_VERSION in the Makefile.
Then build CassKop (code & image)
Run CassKop#
We can quickly run CassKop in development mode (on your local host), then it will use your kubectl configuration file to connect to your kubernetes cluster.
There are several ways to execute your operator :
- Using your IDE directly
- Executing directly the Go binary
- deploying using the Helm charts
If you want to configure your development IDE, you need to give it environment variables so that it will uses to connect to kubernetes.
Run the Operator Locally with the Go Binary#
This method can be used to run the operator locally outside of the cluster. This method may be preferred during development as it facilitates faster deployment and testing.
Set the name of the operator in an environment variable
Deploy the CRD
This will run the operator in the default namespace using the default Kubernetes config file at $HOME/.kube/config.
Note: JMX operations cannot be executed on Cassandra nodes when running the operator locally. This is because the operator makes JMX calls over HTTP using jolokia and when running locally the operator is on a different network than the Cassandra cluster.
Deploy using the Helm Charts#
This section provides an instructions for running the operator Helm charts with an image that is built from the local branch.
Build the image from the current branch.
Push the image to docker hub (or to whichever repo you want to use)
Note: In this example we are pushing to docker hub.
Note: The image tag is a combination of the version as defined in verion/version.go and the branch name.
Install the Helm chart.
Note: The image.repository and image.tag template variables have to match the names from the image that we pushed in the previous step.
Note: We set the chart name to the branch, but it can be anything.
Lastly, verify that the operator is running.
Run unit-tests#
You can run Unit-test for CassKop
Run e2e end to end tests#
CassKop also have several end-to-end tests that can be run using makefile.
You need to create the namespace cassandra-e2e before running the tests.
to launch different tests in parallel in different temporary namespaces
or sequentially in the namespace cassandra-e2e
Note: make e2e executes all tests in different, temporary namespaces in parallel. Your k8s cluster will need a lot of resources to handle the many Cassandra nodes that launch in parallel.
Note: make e2e-test-fix executes all tests serially in the cassandra-e2e namespace and as such does not require as many k8s resources as make e2e does, but overall execution will be slower.
You can choose to run only 1 test using the args ex:
Tip: When debugging test failures, you can run kubectl get events --all-namespaces which produce output like:
cassandracluster-group-clusterscaledown-1561640024 0s Warning FailedScheduling Pod 0/4 nodes are available: 1 node(s) had taints that the pod didn't tolerate, 3 Insufficient cpu.
Tip: When tests fail, there may be resources that need to be cleaned up. Run tools/e2e_test_cleanup.sh to delete resources left over from tests.
Run kuttl tests#
This requires kuttl cli to be installed on your machine
You first need to have a Kubernetes cluster set up with kubectl.
Then to run all tests you can simply type :
This will run all testcases in the /test/e2e/kuttl/ directory in parallel on different generated namespaces (with Casskop automatically installed on each).
If you installed only the binary of kuttl, you can omit the
kubectlat the beginning
Tip: You can specify a single test case to run by adding --test TestCase where TestCase is the name of one of the directories in /test/e2e/kuttl/*here* (like ScaleUpAndDown for example)
Debug CassKop in remote in a Kubernetes cluster#
CassKop makes some specific calls to the Jolokia API of the CassandraNodes it deploys inside the kubernetes cluster. Because of this, it is not possible to fully debug CassKop when launch outside the kubernetes cluster (in your local IDE).
It is possible to use external solutions such as KubeSquash or Telepresence.
Telepresence launch a bi-directional tunnel between your dev environment and an existing operator pod in the cluster which it will swap
To launch the telepresence utility you can launch
You need to install it before see : https://www.telepresence.io/
If your cluster don't have Internet access, you can change the telepresence image to use to one your cluster have access exemple:
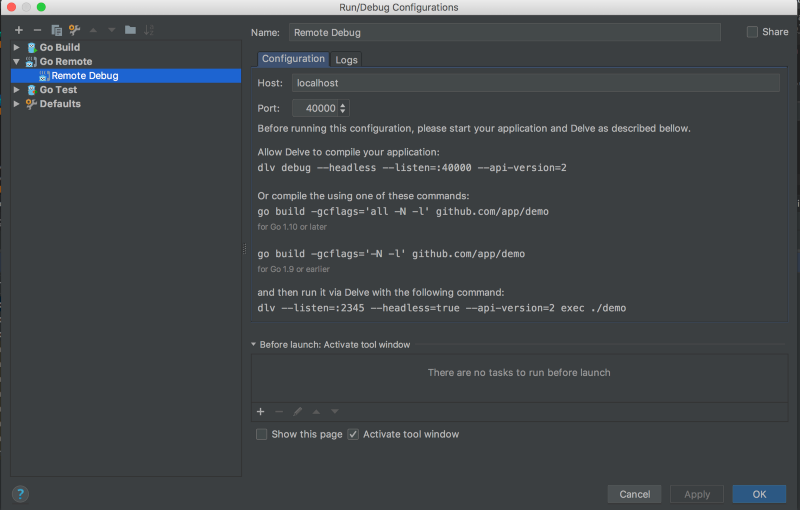
Configure the IDE#
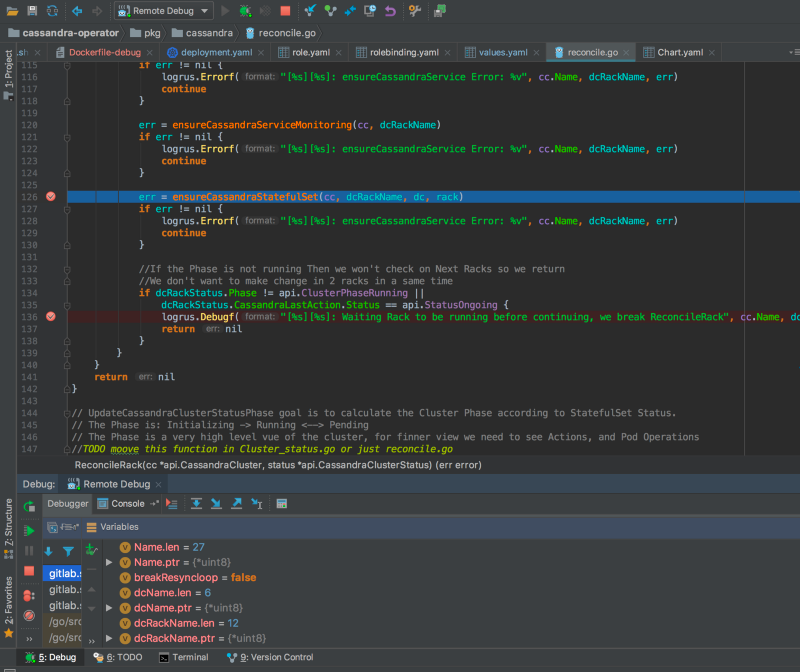
Now we just need to configure the IDE :

and let's the magic happened

Build Multi-CassKop#
Using your docker environment#
Run Multi-CassKop#
We can quickly setup a k3d cluster with casskop and multi-casskop to test a PR on multi-casskop.
- [Build your multi-casskop docker image](#### Using your docker environment) which should print
- Create a k3 cluster with 2 namespaces and install casskop
- Update generated secret to use
server: https://kubernetes.default.svc/in its config (We won't need that method anymore and will be able to create 2 different clusters when https://github.com/rancher/k3d/issues/101 is solved)
- load the docker image you built in the first step into your k3d cluster
- Install multi-casskop using the image you just imported
How this repository was initially build#
Boilerplate CassKop#
We used the SDK to create the repository layout. This command is for memory ;) (or for applying sdk upgrades)
You need to have first install the SDK.
Then you want to add managers:
Useful Infos for developers#
Parsing Yaml from String#
For parsing Yaml from string to Go Object we uses this library : github.com/ghodss/yaml because with the official one
not all fields of the yaml where correctly populated. I don't know why..